Create an Amazon® RDS™ Instance
Overview
This document explains how to create an Amazon® RDS™ instance.
Create an Amazon RDS instance
Log in to the Amazon Web Services Management Console
Click to view a screenshot…
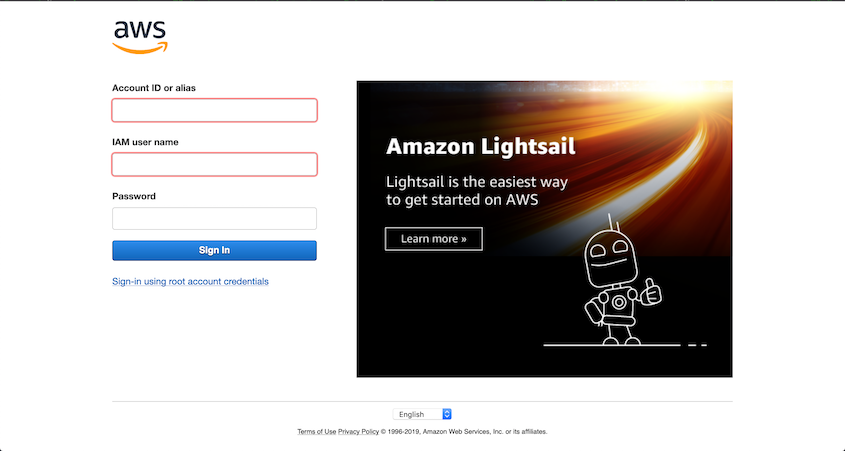
Log in to the AWS™ Management Console with your Amazon AWS account.
The AWS Management Console page will appear.
Select your region
Click to view a screenshot…
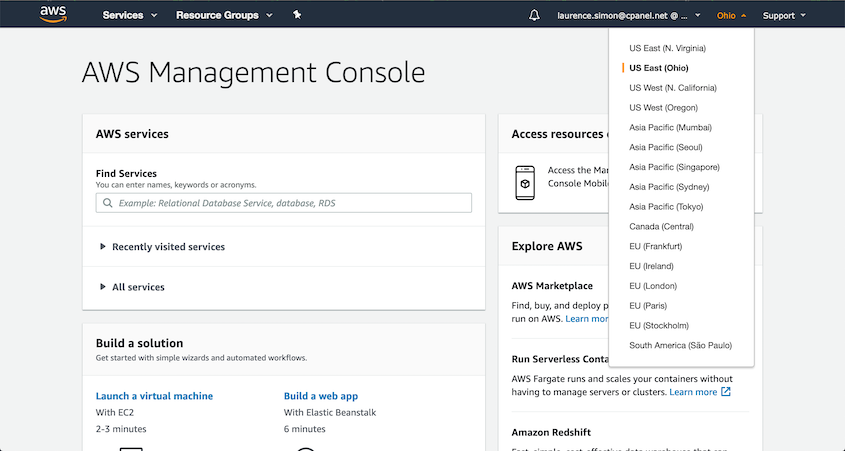
To select the region in which to create the database, perform the following steps:
-
Click the Region setting in the upper-right corner of the page.
-
Select the region in which you wish to create the RDS instance.
Open the RDS Console
Click to view a screenshot…
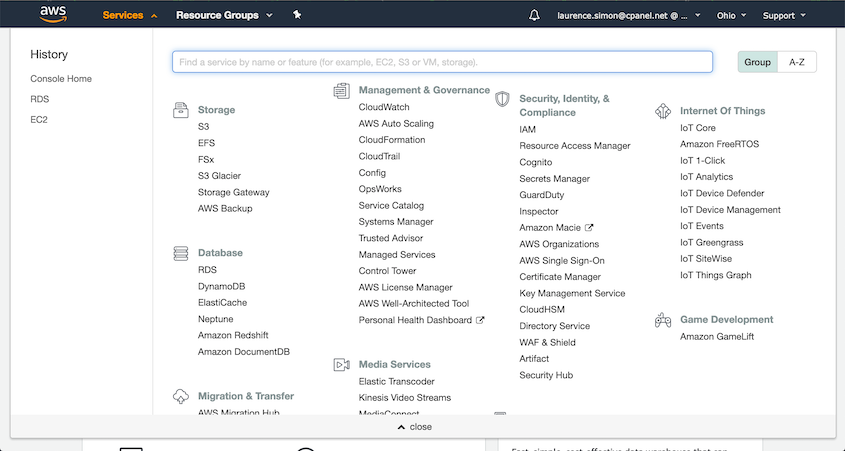
To open the RDS Console, perform the following steps:
-
Click the Services setting in the upper-left corner of the page.
-
Click RDS. The RDS Console will appear.
Create a parameter group
Click to view a screenshot…
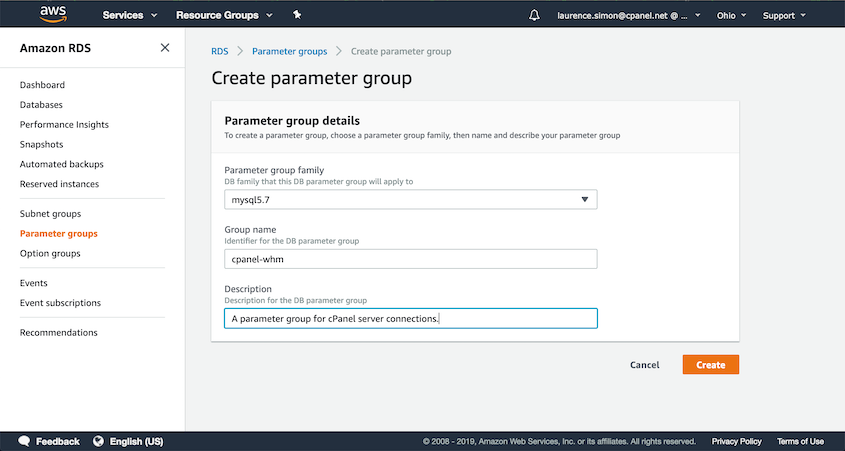
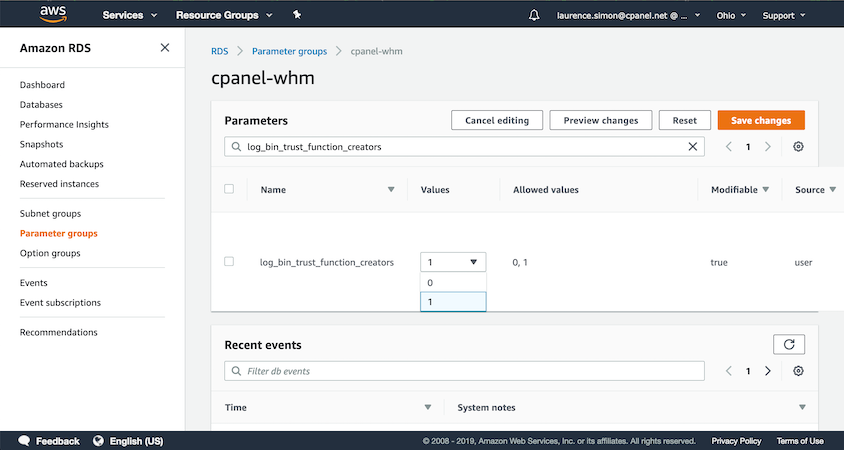
You must create a parameter group so that cPanel & WHM can properly connect to the database.
To create a DB parameter group, perform the following actions:
-
In the left sidebar, click Parameter groups. A new interface will appear.
-
Click Create parameter group. A new interface will appear.
-
From the Parameter group family menu, select the version of MySQL® that you wish to use.
Note:-
cPanel & WHM versions 86 and earlier only support connections to MySQL 5.7.
-
cPanel & WHM versions 88 and later on CentOS 7 and 8, CloudLinux™ 7 and 8, and Red Hat® Enterprise Linux® 7 support connections to MySQL 5.7 and 8.0.
-
cPanel & WHM versions 94 and later on AlmaLinux 8 support connections to MySQL 5.7 and 8.0.
-
-
Enter a Group name for the parameter group. We recommend that you use the
cpanel-whmname. -
Enter a Description of the parameter group.
-
Click Create. The Parameter group interface will reappear.
-
Click the
cpanel-whmparameter group. A new interface will appear. -
In the Filter parameters text box, enter
log_bin_trust_function_creators. -
Click Edit parameters.
-
In the Values menu, select 1.
-
Click Save changes.
-
In the left sidebar, click Dashboard.
Create the database
Click to view a screenshot…
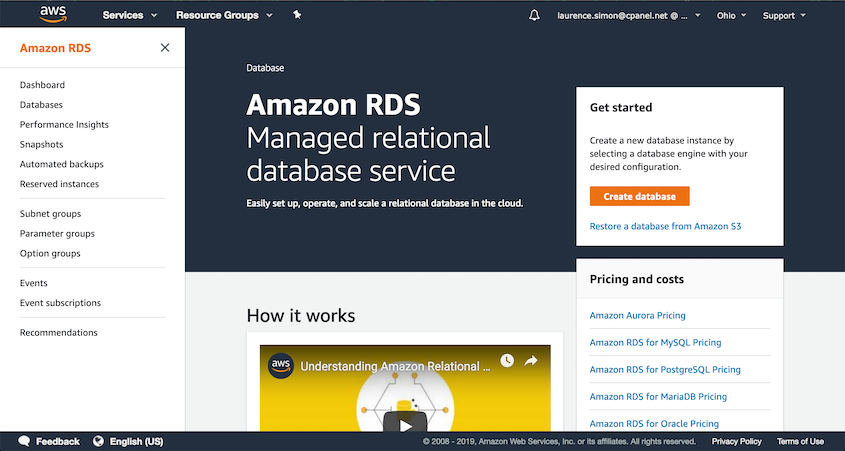
Click Create the Database. A new interface will appear.
Select the database engine
Click to view a screenshot…
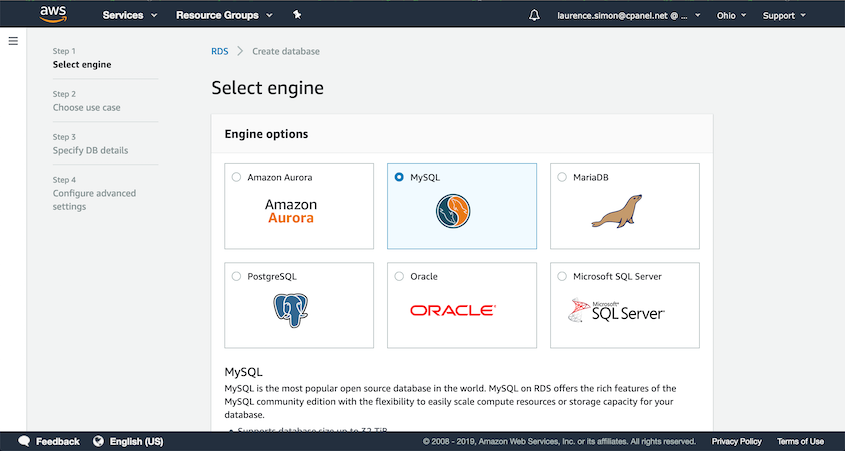
Select the MySQL database engine, and then click Next. A new interface will appear.
-
cPanel & WHM versions 86 and earlier only support connections to MySQL 5.7.
-
cPanel & WHM versions 88 and later on CentOS 7 and 8, CloudLinux 7 and 8, and Red Hat Enterprise Linux 7 support connections to MySQL 5.7 and 8.0.
-
cPanel & WHM versions 94 and later on AlmaLinux 8 support connections to MySQL 5.7 and 8.0.
Select your use case
Click to view a screenshot…
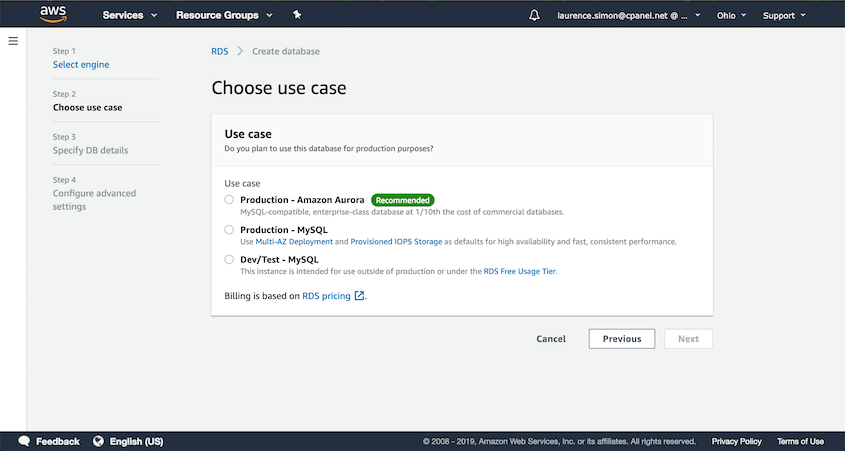
Select the use case for your database and click Next. A new interface will appear.
Specify the database details
Click to view a screenshot…
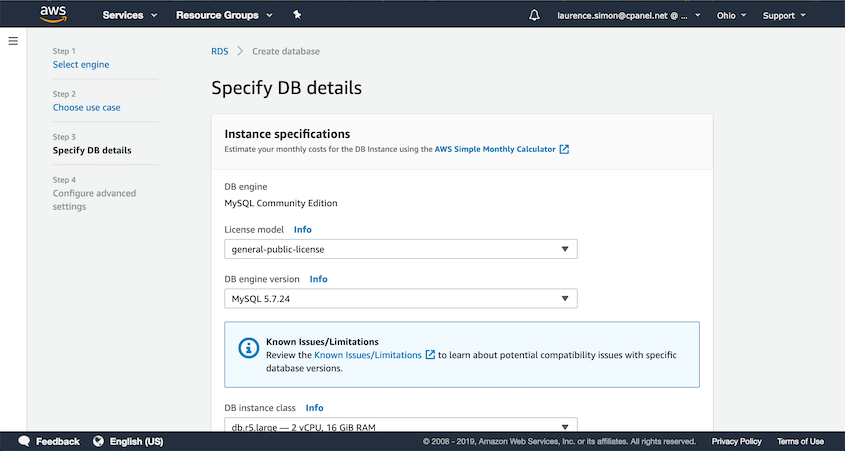
To specify the details for your database, perform the following actions:
-
Select the default License model.
-
Select the DB engine version that you wish to use.
Remember:-
cPanel & WHM versions 86 and earlier only support connections to MySQL 5.7.
-
cPanel & WHM versions 88 and later on CentOS 7 and 8, CloudLinux 7 and 8, and Red Hat Enterprise Linux 7 support connections to MySQL 5.7 and 8.0.
-
cPanel & WHM versions 94 and later on AlmaLinux 8 support connections to MySQL 5.7 and 8.0.
-
-
Select the DB instance class. Your instance type determines the rate at which AWS bills you. Make certain that you select an instance type that includes appropriate resources for the type of system that you wish to run.
-
Select whether to deploy the database in Multiple Affinity Zones (Multi-MZ).
-
Select the Storage type.
-
Select the amount of storage space.
-
For MySQL servers, select the Provisioned IOPS rate. This value determines the number of I/O operations per second that the database can support.
Configure the database settings
Click to view a screenshot…
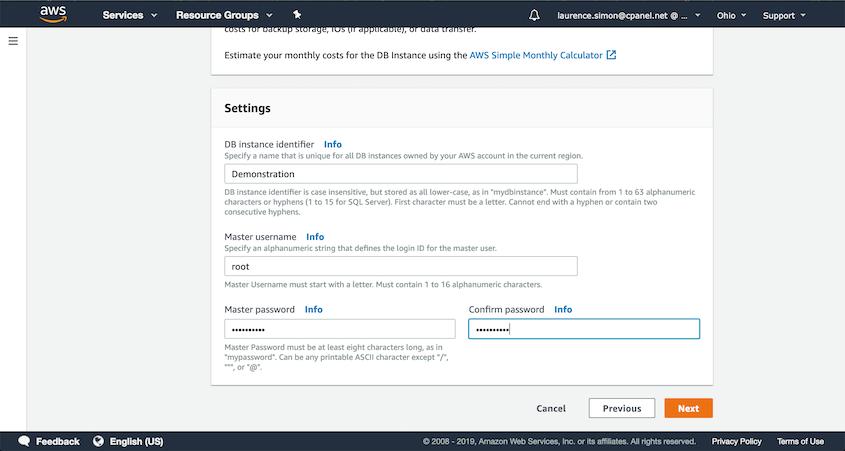
To configure the database settings, perform the following actions:
-
Scroll down to the Database Settings section.
-
Enter a name for the database.
-
Enter
rootas the username. If you do not enterrootas the username, some functions in cPanel & WHM will not function properly. -
Enter the password and then confirm it.
-
Click Next. A new interface will appear.
Configure the advanced settings
Click to view a screenshot…
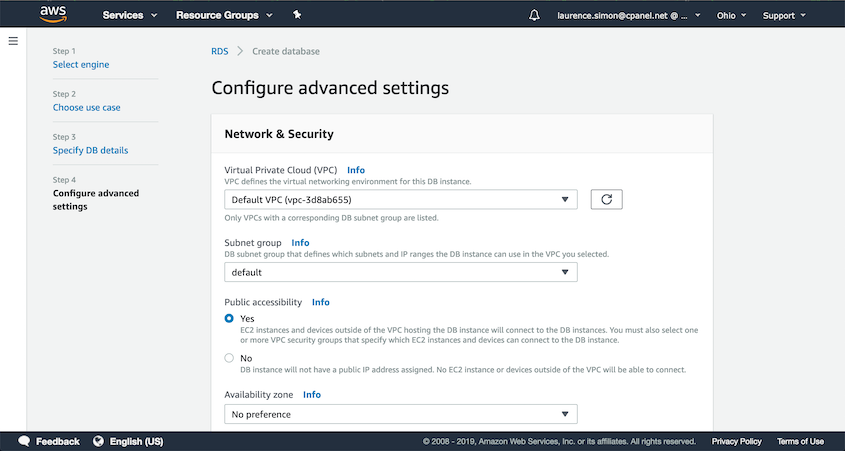
To configure the advanced settings for the database, perform the following actions:
-
Select the desired Virtual Private Cloud (VPC) for the database instance. If you host servers with AWS, we recommend that yo use the same VPC for each server.
-
Select the desired Subnet group for the database. We suggest that you select the default value.
-
Select whether the public will have access to the database. If you select No, only cPanel & WHM servers that you host at Amazon will be able to access the database.
-
Select the desired Availability Zone for the database instance. We recommend that you select the No preference value.
-
Select the desired VPC security groups for the database instance. If you host servers with AWS, we recommend that you use the same security groups for each server.
-
Select the desired Port for database connections. We recommend that you use the current value.
-
From the DB parameter group menu, select the
cpanel-whmDB parameter group. -
Select your desired Option group. We recommend that you use the current value.
-
Select whether to enable or disable IAM DB authentication for MySQL.
-
Select the desired Encryption settings.
-
Select the desired Failover settings.
-
Configure your Backup settings for the amount of days to retain backups, the time window in which to run backups, and whether to copy tags to snapshots.
-
Configure your Monitoring settings. We recommend that you select the Default monitoring role and retain a 60 second granularity.
-
Select whether to post log files to Amazon CloudWatch™.
-
Select whether you wish to allow automatic updates of the database engine for minor versions.
-
Select whether you wish to disable deletion of the database. This will prevent accidental deletion of the database.
-
Click Create database.
View the details
Click to view a screenshot…
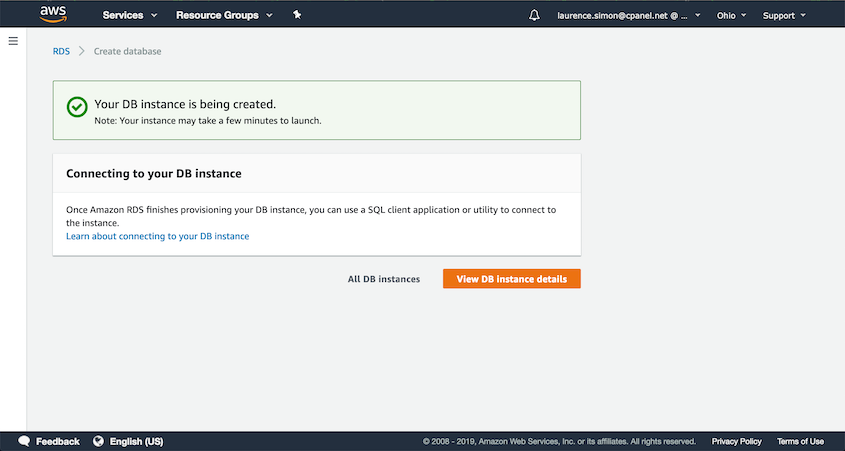
Click View DB instance details. The database console page will appear.
Obtain the endpoint
Click to view a screenshot…
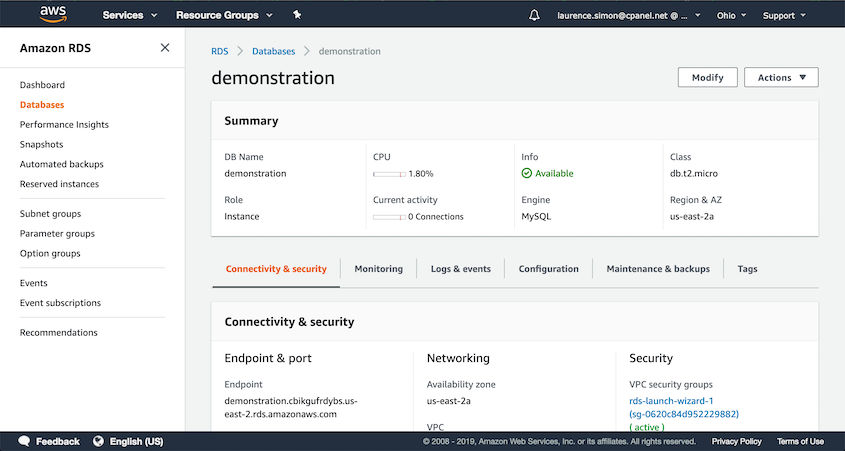
Wait for the Info value to change to Available. Then, scroll down to the Connectivity & security section.
The Endpoint value represents the hostname to which you will connect in WHM’s Manage MySQL Profiles interface (WHM >> Home >> SQL Services >> Manage MySQL Profiles).
